
How to Display Product Variations in WooCommerce?
Posted on Apr 08 2021 by in best Wordpress themes for blogs Blog Blog Post Blogs Blogs and Blogging Responsive WordPress Themes Uncategorized
Have you ever wished to sell several variations of your product on your e-commerce website? This might range from color preferences, different sizes for t-shirts to any other factor you might have for your product. The WooCommerce plugin gives you the ability to do this easily through its Product Variation feature.
We will take you through the process of creating product variations in this post and at the same time, we will highlight its importance and use in the modern world of WooCommerce.
What are WooCommerce Product Variations?
You are already familiar with the fact that the majority of products come in many options: scent, size, color, just to name a few.
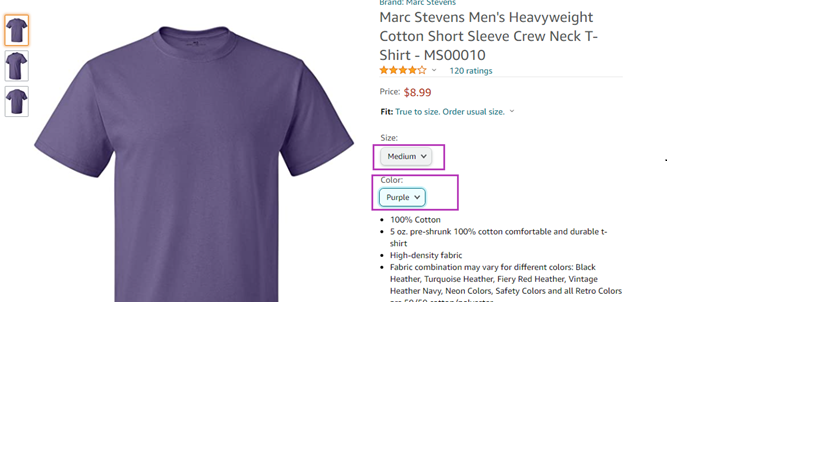
In WooCommerce Product variations are represented as a type of product called Variable Products. WooCommerce gives you the ability to control the stock, image, and price of each variation of your product.
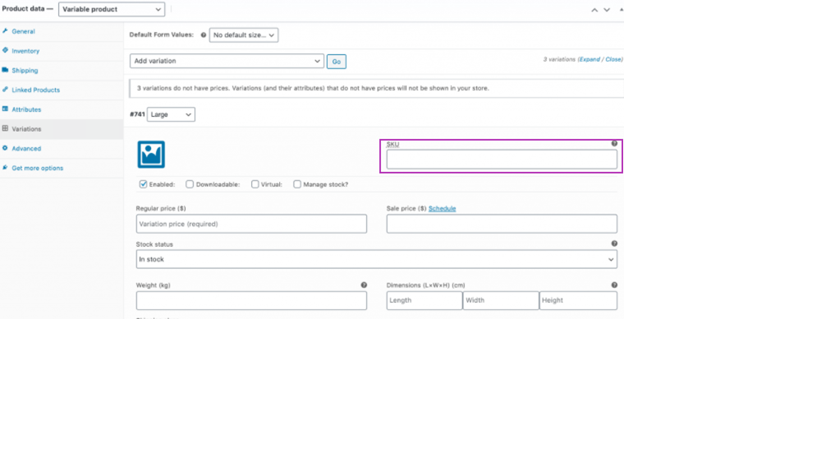
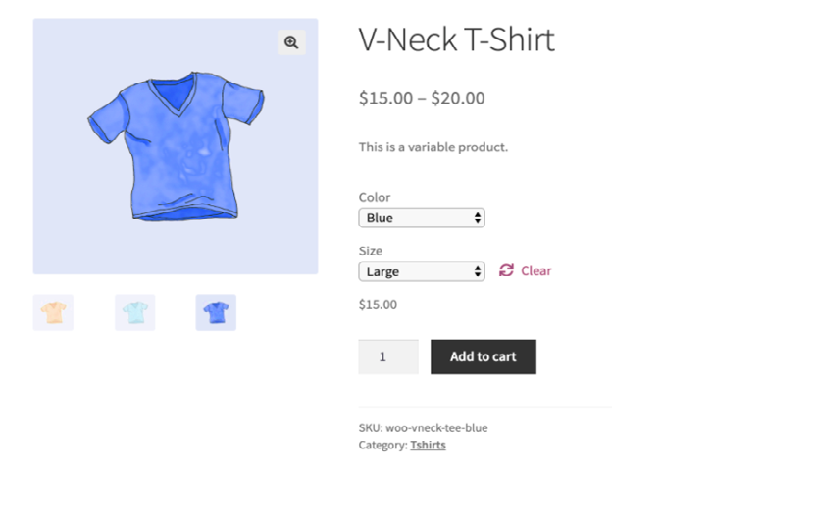
Every variation of your product requires an SKU number (Stock Keeping Unit) to differentiate from other variants. Since it might be confusing when all variations are displayed on different pages, WooCommerce displays them on a single page with a selector to switch between the different variants.
How to add Variable products in WooCommerce
Step 1: Set up the Variable Product
All you need to add a product variable is to either create a new product or edit an existing one.
- Navigate to WooCommerce, Products
- Choose Add product or select a product in All Products and click Edit to modify it
In the Product data dropdown choose Variable product
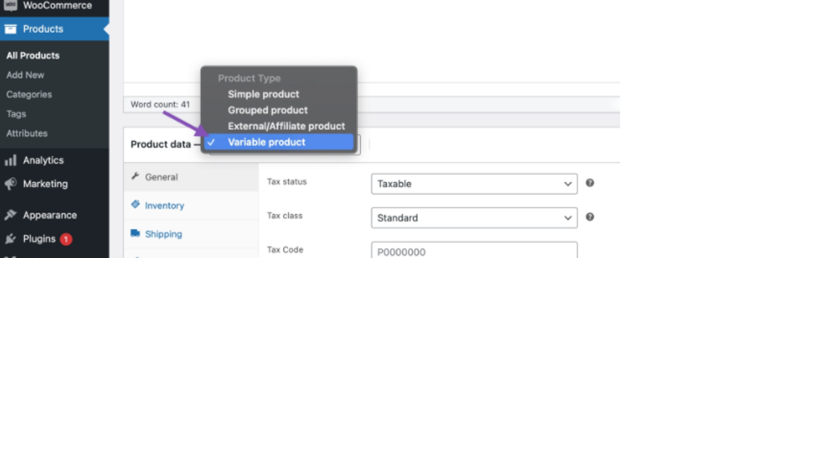
You will notice that some product options will have changed. One of these changes is that you can now not enter a product’s price. You can fill in this information at a later stage.
Step 2: How to Add Product attributes for Product variations
Select the attribute tab and from the variable attribute dropdown, you can select the default WooCommerce attributes (Color and size) or you could choose to add a new custom one
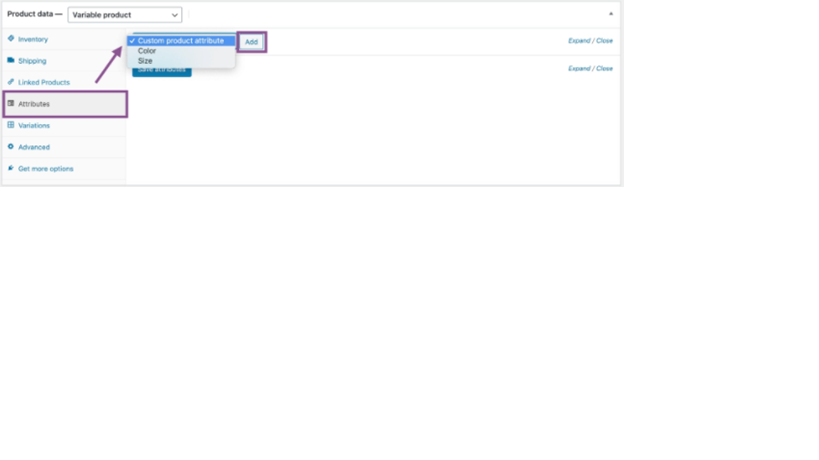
For pre-existing attributes make sure to enable the options: Visible on Product Page and Used for variations. After that, you could add as many attribute values as you would wish.
Step 3: How to Generate Product Variations
Navigate to the Variations tab, you will find a drop-down menu with the options: Add variation, Create Variations from all the attributes.
If you choose the second option, WooCommerce will automatically generate Product Variations for each combination of attributes you have specified. Let’s say you specified two attributes Size (Medium, Small) and Color (Red, blue). The variation this option creates is
- Medium Red
- Medium Blue
- Small Red
- Small Blue
However, if you would want to do this manually, select the first option and use the menus you will find to create each product variation. Each variation requires you to provide an SKU number to help in the management of inventory.
You also have the option to choose how you would want to price each of the product variants by specifying prices for each of them.
Step 4: Publishing your Variable Products
There is additional information you would wish to add to have a complete page such as price, image, taxes, just to mention a few. Having set up the Product variations according to your liking, you can proceed to publish your product page.
Product variations are meant to provide a good shopping experience for your customers and having learned the process of setting it up, nothing should stop you