

From the beginning, our objective has been to produce the fastest page load times for our customers’ sites, without sacrificing security. And every regular update we roll out is meant to enhance our customers’ experience in one or both of these ways.
So it pains us to see our customers do anything that will inhibit the speed and security they’re paying for.
For example, some of our customers have hacker entry points lurking on their websites and don’t even know it (or didn’t, until we scanned every site and told them). Others use plugins when they don’t need to, which can hinder speed and security.
Today, let’s discuss another simple issue we see from time to time on customer sites that needlessly kills page load times while providing nary a benefit: unoptimized images.
When Should You Used Web-Optimized Images?
How about … always?
Clearly there will be certain exceptions to this rule.
- If you run a photography site, you’ll probably have high-res images available for customers to purchase or download.
- Sites like NASA.gov often post compelling high-res images from space that are fun to examine for detail.
- Sports sites will post high-res 360 degree pan shots of crowds that provide incredible detail.
However, when displaying these images on the main pages of your site, there is absolutely no reason to use the high-res version. You want to optimize it for the web, so users can see it more quickly (because the page loads more quickly).
For example, Trey Ratcliff, who runs the site Stuck In Customs, is an excellent photographer. I met him at WordCamp in Dallas a few years ago and even won a raffled copy of his book “A World in HDR.”
If anyone would use high-res images all over his blog, you’d think it would be Trey. His pictures are so immaculate, so colorful, so vibrant … you’d think he’d want to ensure that they are viewed at the highest resolution possible.
But Trey smartly uses web-optimized images all over his blog … and the pictures look great!
Click here and here to see how quickly his pages load and how great the pictures look. Each one of those pictures is a JPEG image weighing in at less than 100KB.
Now, his audience is able to view the higher resolution version of the pictures, should they choose to. But this happens after they’ve seen the quickly loading, lower-res image, and have been compelled enough by it to click through.
The alternative is to display a higher res image that is initially resized to fit the display area — which defeats the purpose of using the higher resolution in the first place – that loads slower and possibly leads to user impatience.
Not good.
Not in this day and age of I WANT IT RIGHT NOW web browsing.
How To Easily Optimize Images For The Web
The nice thing is that it’s easy to optimize images for the web, for either posts and pages or for your theme — the latter of which is an often overlooked place, where unoptimized images can hinder load times.
Optimizing Post & Page Images
For post and page images, set the resolution of the picture to 72. It simply doesn’t need to be any higher than that to look good within the standard pixel widths of a website when displayed in a web browser.
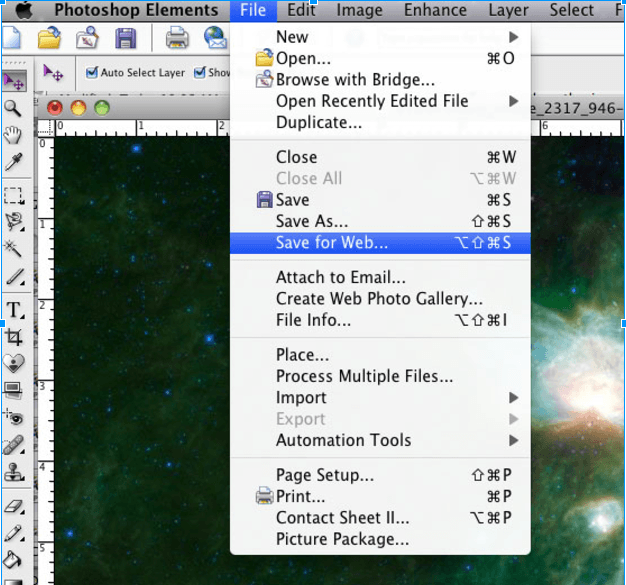
I use Photoshop for my image editing, which makes it very easy to optimize images for the web with the Save For Web option:
Another option, which I have not personally used but that was recommended by one of our designers here at Synthesis, is WP Smush.it. This is a plugin that will take care of optimization on new and existing images.
I like to keep my plugins to just the essential ones, so I’ll keep optimizing with Photoshop before I import, but give WP Smush.it a try, especially if you have a lot of old, unoptimized images.
Update: As a commenter noted, WP Smush.it is not currently working with the latest WordPress update. See! This is why you have to vet your plugins!
And keep this in mind when it comes to post and page images:
Depending on your theme and how your front page is organized, images are often pulled as thumbnails or previews. Sometimes these are automatically reduced in size automatically by a plugin, but other times they are just resized versions of the bigger image. If your home page is pulling in 5, 10, 15 of these resized large images, it’s going to load slowly.
There is no reason to kill your page load times for unoptimized images. However, you can try an expat VPN to test out your website from another location. Sometimes, it loads slow for you only.
Optimizing Theme Images
The same rules of thumb go for theme images: resolution of 72, and use Photoshop or any other means you have of “saving for web” to do it easily.
Another area for imagine optimization that people sometimes overlook is background images, specifically patterns. Just by reducing the image size of a pattern and allowing it to repeat makes it easier and quicker to load.
JPG or PNG?
And a final note about image types.
If your image is going to have a transparent background, PNG is the way to go. It will hold the transparency when displayed on most web browsers, especially the newer ones.
If, however, your image does not have any transparency in it, then JPG (or JPEG) is the way to go. The image sizes will typically be smaller for JPGs.
Ultimately, it’s all about speed.
Faster load times equal happier, more engaged users who are more likely to return to your site.
You aren’t offering up any less value by displaying optimized images on your website, so make sure you don’t kill the quicker load times you’re paying a premium for by using unoptimized images.