Please find below our basic guide to help you on how to access and use WordPress.
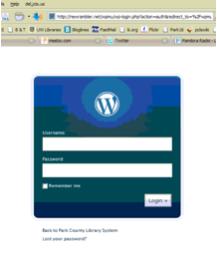
First, go to http://yourdomain.com/wp-login.php. You’ll get a screen that looks like this, where you can enter your username and password.
When you login, you’ll be taken to the Dashboard:
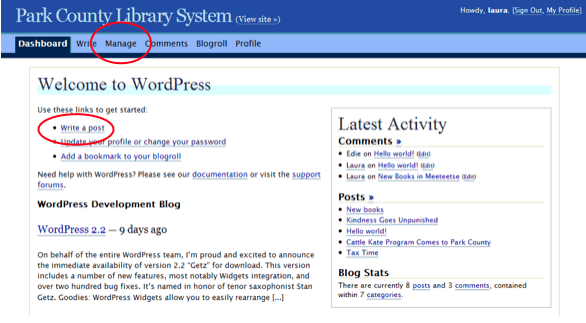
The two main things you’ll use for now are “Write a post” and “Manage.” “Write a post” allows you to add something to the front page of the website. “Manage” lets you change things you’ve written in posts or change the static pages (those are the tabs across the top—Cody, Powell, Meeteetse, Research, Library Cards, etc.).
WRITING A POST
When you click “Write a post,” you’ll get a screen like this:
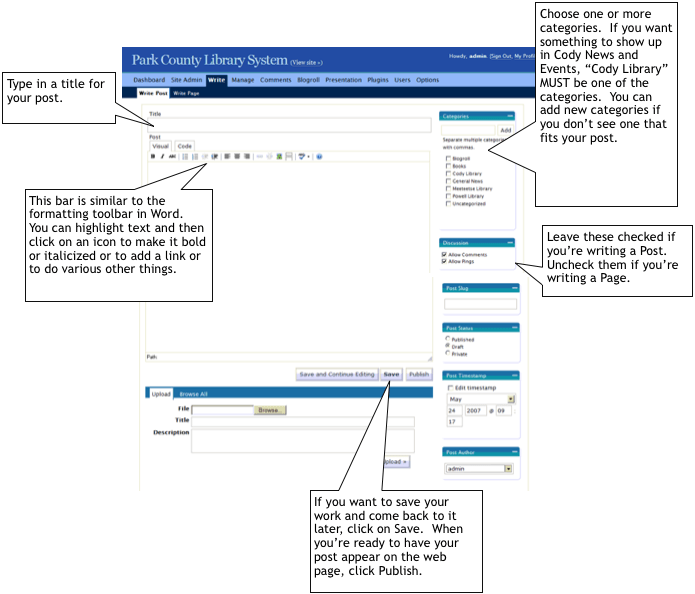
There are some other things you can fiddle with (such as uploading files and changing the timestamp of a post), but we’ll get into that later.
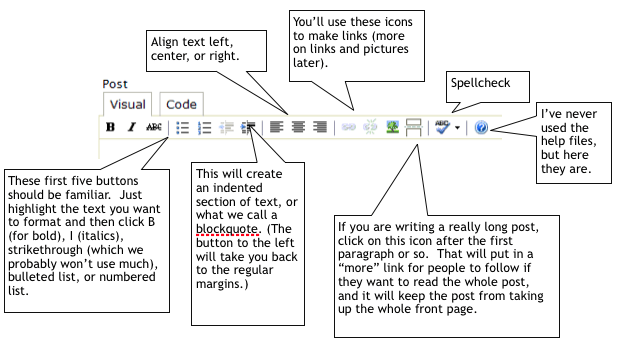
USING THE TOOLBAR
Let’s take a closer look at the toolbar. You’re going to be using the Visual tab (the Code tab lets you see the html markup, if you’re curious).
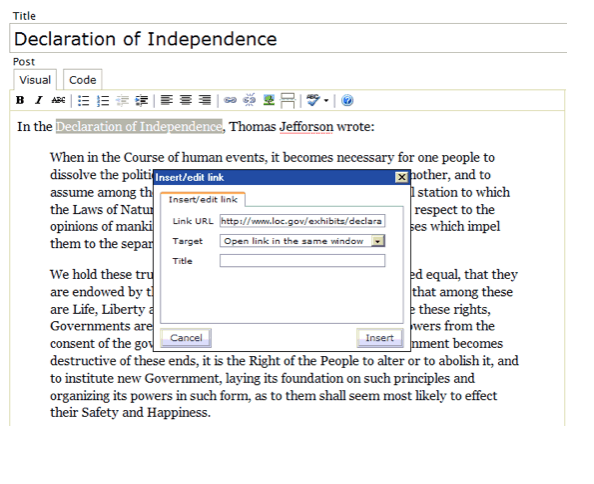
MAKING A LINK
Sometimes you’ll want to be able to link some text to a website (you can even link book titles to items in the catalog). Here’s how to do it:
highlight the text that you want to link to
click on the little link icon on the toolbar
type the url of the site you are linking to in the dialog box (you can leave the Title field blank)
click on insert
In the example below, the words “Declaration of Independence” will become a link to a Library of Congress site about the document.
