
This valuable report to grow your business includes:
Intro to WordPress
- About SEO and Copywriting
- Choosing the Right Keywords
- Optimizing Your Page or Post
- More SEO Copywriting Tips
- Final Words
TESTIMONIALS
”I own an SEO company in Vancouver. I first hired Liza J. Lee in 2008 to help with a clients text in their website as they had none. Liza called the client, interviewed them and created content in less time than she had originally promised. The quality of the text was excellent and the client was very happy. I have hired Liza more then once and strongly recommend her for copywriting as well as for all information relating to art. She has her fingers on the pulse of the Vancouver art scene so worth speaking to.”
Eric Ayache, President, Guaranteed SEO
”I had the pleasure of working with Liza on an SEO project with a small business in Vancouver. Liza continually exceeded my expectations with her knowledge of the SEO process, organizational skills, passion for delivering a superior product, and great communication. I highly recommend Liza for your SEO copywriting needs.” Michael Carels, President, Carelli Studios
”Liza provided a solid foundation for our website as a copywriter / editor to ensure the right style and voice was used and that SEO was appropriately utilized. As a professional she is a pleasure to work with.” Frank Kusmer, Partner of CK-Global Solutions
- INTRO TO WORPRESS
As a business owner, you may want to also install a WordPress blog to your own website as this makes it easier and faster for you to add fresh content regularly. That’s because you don’t need to know any coding or how to use special software to add new pages. Google and other search engines like sites that have new content and, if it is optimized well, you are rewarded with relevant and targeted traffic to grow your business.
WordPress is a free blogging tool and publishing platform and is often categorized as a content management system (CMS). WordPress has many features including a plug-in architecture, a template system and, as of August 2016, it is the platform for 80% of all new websites, making it the most popular CMS in use on the Internet.
- ABOUT SEO AND COPYWRITING
To attract the right traffic and convert sales leads on your website or WordPress blog, you’ll need to incorporate SEO and copywriting into your selected webpages or blog posts. SEO is the active practice of optimizing your site by improving internal and external aspects to increase the traffic that your site receives from search engines. This report outlines various simple SEO tips, which will help you reach your online goals effectively by optimizing your website with SEO copywriting. Without the right keywords with integrated SEO copywriting, you will not attract the right traffic to your website or WordPress blog. All that effort into a well-designed site will go to waste. But help is on the way!
After reading this document, you should be able to write copy with the correct keyword strategies. As well, you will be able to optimize those keywords and create benefit-driven titles for your website or WordPress blog to increase your visitor traffic and customer base.
- CHOOSING THE RIGHT KEYWORDS
First you’ll need to choose the right keywords for organic or free search traffic. So make sure you have your main keywords on your chosen webpages. Each page should be around 300 words. You should place your page’s main keywords in the first and last 25 words on that page. To find what other keywords Google has associated with your main keywords, here are two methods:
Use the tilde “~” command to find associated phrases in Google. Just type into Google search: ~keywords. Variations will be highlighted in bold print.
Or visit Google Trends at http://www.google.com/trends/ to discover the top 100 searches to incorporate into your blog post. This might help give you an idea for one of your blog posts. For example, “What is Bitcoin?” was one of the top 100 searches and I recently wrote a single blog post about it on CoinFest Art & Trade Show involving Bitcoin on a one-page site, which attracted Twitter followers, Facebook Likes and an interview with CBC TV (mainstream media).
Once you have your right set of keywords, you’ll need to select your best 10 webpages or blog posts to optimize to attract relevant and targeted traffic to grow your business. And each page or blog post should contain only one set of keywords. You cannot mix them up or you will not get any or good results from search engines!
- OPTIMIZING YOUR PAGE OR POST
Step 1 – Page title:
Include the keyword in the title of the page. The page title is located at the top of your HTML page and it tells the search engines what your page is about. When you open your page in a browser these are the words at the very top of the screen. The title tag is crucial to ‘on-page optimization’; it should include your main keywords and it should be 63 characters or less if you want your title to appear in full on Google. Place the title in the title tag on the webpage itself and in the URL for that page. Pick the main keywords from the title and place them in the anchor URL instead. For example: www.yourwebsite.com/keywords.html
Step 2 – Meta tags:
The Meta Tag contains the description for your web page. Your description will show up in all the search engines so you have to be careful to write precisely and objectively. It should be about 140 characters or around 20 words. Make sure to include your keywords but don’t spam (don’t repeat your keywords more than once). Mention each of your keywords separately in the meta description tag and use variations of your keywords. Include each of the plural and singular forms of the keywords in the keyword tag to optimize your webpage for one keyword. You should choose only one set of keywords per page.
Step 3 – H1 tag:
Add an H1 header tag aka as a headline. Once the code screen is open, click “edit”, then “find” and search for the text “H1”. This is the HTML code used to enclose what’s called an H1 header tag. You should always include your main keyword within an H1 header tag.
Step 4 – H2 tag:
Next add what’s called an H2 header tag or subhead. Your H2 tag should always come after your H1 tag.
Step 5 – Bold, italics and underline:
Go through your webpage and add your most important keyword throughout your page content. You will want to bold, italicize or underline your text with keywords. Only choose to use one or two of these styles with your keywords to make it look ‘natural’.
Step 6 – Alt tags:
Add your keyword to alt image tags. This tag should have your title or the main keywords from your page title to be the most effective. The anchor text is also important to know – these are the underlined, clickable text or words in a link. To check Google for all web pages containing your keywords in the anchor tags, type into Google Search “allinanchor:yourkeywords”.
Step 7 – Home page links:
Add a link from each webpage, within your website, that says “Your Keyword Home”. This link should link back to your main page using the URL; otherwise, you split up your back links. Note: It should not link to index.htm or index.html. It should like you’re your actual URL.
Step 8 – All page titles:
Finally, add the keyword to the page title to all of your select web pages for optimization. Just add main keywords to the beginning of the page title. The new title of this page should be: Your Keyword. This encourages the search engines to see that your website is all about your keyword. Once you’ve optimized your selected webpages or blog posts with your chosen keywords, you’ll also need to include effective copywriting techniques.
- MORE SEO COPYWRITING TIPS
By placing your top-performing keywords in strategic places on your website, you tell the search engine “spiders” that those keywords describe exactly what your site is all about. And that’s what convinces the search engines to include your site in the search results for those keywords. Here are the most important SEO copywriting tips for search engines, including Google.
Your domain name contains your top keywords:
Search engines love URLs that contain keywords that visitors type into search boxes! These sites whose domain names include keywords will likely rank higher in the search engine results for those keywords in comparison to sites that don’t.
A well-written benefits-driven title tag:
Your title tag is a simple piece of HTML code that’s located in the “head,” or top, of your Web page. It’s a bit like indexing your webpage, like a library. In your title tag, include a detailed, accurate and benefits-rich line of text that describes your business clearly, letting potential visitors know exactly what they can expect to find on your site. It should be no more than 63 characters. Any title tag text over 63 characters may be cut off by certain search engines.
Your benefits-driven headline tags:
A headline tag is like a brightly colored post-it note within your HTML source code that alerts search engine spiders to your headline and subheads, both of which contain important information for the search engines. Your headline should contain the benefit your visitor expects to receive or experience on that webpage.
Benefits sell while features tell:
Benefits are why your visitors will enjoy your service or products and features are the attributes of your services or products. For example, web optimization is a feature of web content, while web traffic increase is the benefit of web optimization. Don’t forget to update your sitemap.xml for Google and your urllist.txt for Yahoo before submitting these to the top two search engines.
Use a Call to Action (CTA):
A CTA is an image or text that prompts visitors to take action, such as “subscribe to a newsletter”, “view a webinar”, or “request a product demo”. CTAs should direct your visitors to landing pages, where you can collect their contact information in exchange for a valuable marketing offer. In that sense, an effective CTA results in more leads and sales conversions for your website.
- FINAL WORDS
With WordPress, you can select free templates and customize them yourself. Once you have your WordPress set up and designed, you can also add plug-ins and integrate that into your social media such as Twitter, Facebook and LinkedIn. With a WordPress site, you can easily add fresh and optimized content for Google and other search engines to send you targeted and relevant traffic to grow your business.
Or prefer an expert to help set up and design your site, select your SEO keywords and provide the copywriting? This helps you to focus on what you best.
Create a professional website
When you want to take your work to the web, your best friend is WordPress. The extremely customizable platform is capable of being whatever you want it to be. To get the look and functionality you want, you can count on professionally made WordPress sites from Solostream.
The WP community is big. Really big in fact. We’re talking thousands of designers and developers, tens of thousands of writers, and millions of users, all contributing to pushing WordPress forward. And one very popular way to do this is designing and developing WordPress premium themes.
It’s now easier than ever to use platforms such as WordPress to create a highly effective and professional website, which is easy to edit and navigate as you please, similarly to the way you would a blog page.
Vital Pieces of WordPress
Now, let’s assume you have decided that you’re going to use the WordPress platform to create your site, but you’ll not use it in order to host. If you would like to learn more about the most effective plugins, you can look for assistance from websites specializing in WordPress security. You only need to pick the best ones you could incorporate with your WP site.
Internal link structure is among the essential issues of SEO. Therefore, understanding how to set-up page redirects with WordPress could be convenient in the longer term. Additionally, It will become simpler for you to spot changes in code structure which will indicate that malicious code was injected into the WP theme.
Since then search engines won’t decrease your own page rank. This flexible tool enables anyone to establish an authoritative website with highly little effort. WordPress websites are really an excellent and inexpensive method to appeal to your desired customers along with a phenomenal strategy to succeed at SEO.
Let’s say you possess a site that you would like to rank well. Now you need to be able to observe the website and it will look the very same. As a consequence, their website might be hacked.
Here, we routinely help small business owners get started with their online presence buy starting with a fresh copy of WP and a professional theme. Based on our interaction with our clients, here are a good few points of DO’S and DONT’S when buying a WordPress Theme.
WordPress Theme Do’s
- Do know the type of site you are
- Do know what you want your website to do
- Do know your needs for functionality and design
- Do know where people are using your website
- Do think about your need for multiple layouts
WordPress Theme Dont’s
- Don’t get persuaded by colorful imagery
- Don’t assume anything about your theme
- Don’t buy themes for their functionality (that’s the job of a plugin)
- Don’t panic
We make it incredibly easy to build premium WordPress sites in no time. In just 30 minutes, you’ll be able to get a gorgeous site up and running. Subscription to this service also gives you access to tons of pre-built themes and tools that will make the interface of your site look and work great. Please reach out to SoloStream support today to get your site started!
WordPress is an open source, online tool which is used for creating websites. It is written in PHO. These days, WordPress is the most common tool used in web development when it comes to CMS, or website content management system and blogging.

Why use WordPress for web development?
There are many reasons which have made WordPress so popular these days.
Here are a couple of reasons as to why WordPress is one of the most popular tools used when it comes to website development:
- Ease: When it comes to WordPress, it is very intuitive and an easy to use system. It allows the users to add new pages, images, blog posts etc quite quickly and easily. It uses a very simple technology and as a result, not too much of time is wasted on the formatting part.
No FTP Software or HTML Editing Required: WordPress doesn’t require HTML software for editing and it is a self-contained mechanism. Different operations like uploading documents, image galleries, video files and etc can be done without the help of any additional FTP or HTML software.
- Search Engine Friendly: The codes used in WordPress are very simple and clean which makes it easier for the search engines to index and read the content of the sites. Apart from this, every single image, post and page have their own meta tag, description, keyword and title which makes them optimized for the search engines.
Customizable Design: With the help of WordPress, a 100% customizable website can be designed which can prove to be very helpful when it comes to Online business promotion and search engine optimization.
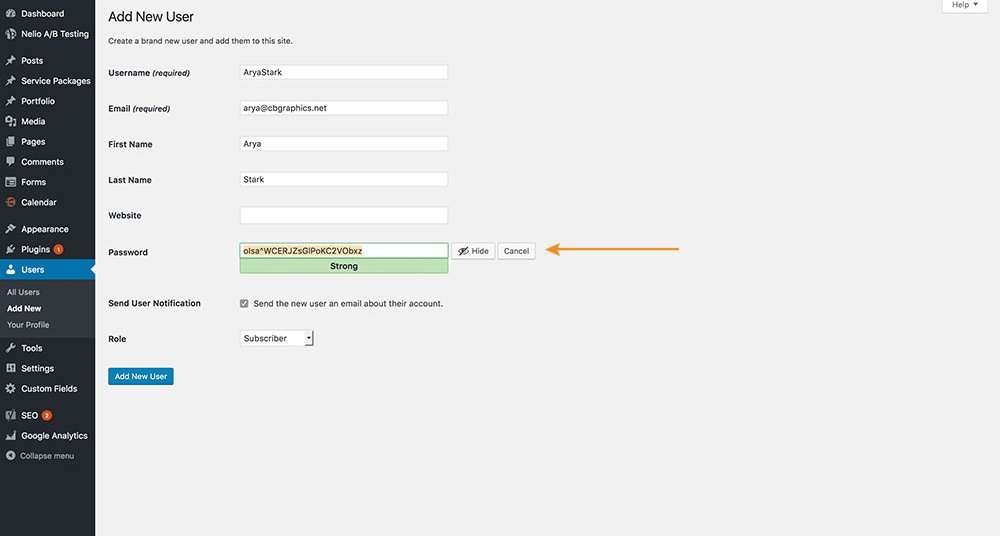
Multiple Users: An administrator of a website made from WordPress can assign different capabilities and access levels for different users.

How to use WordPress?
Here are a couple of important tips which you would find useful while using WordPress for development.
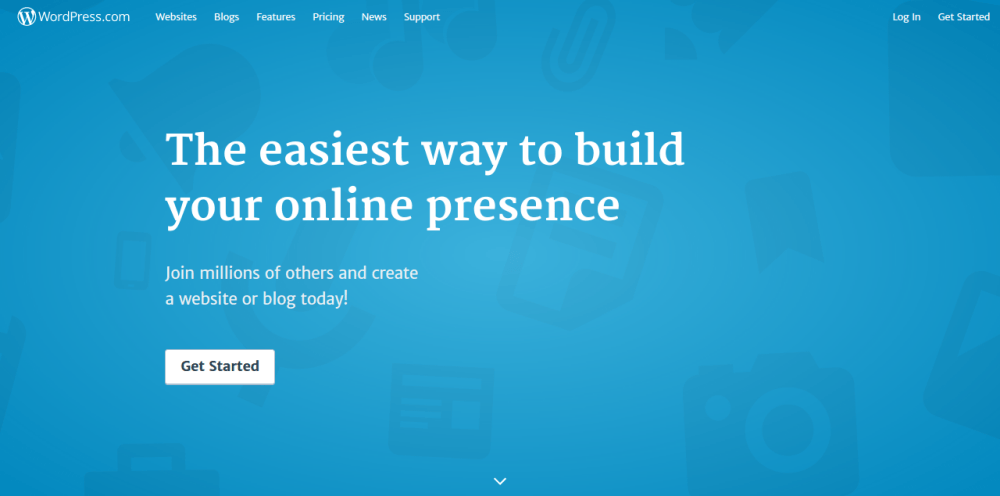
- Visit the Website of WordPress: At first you need to visit the WordPress website and then click on the button which reads as “Get Started”
- Enter your Details: You need to create an account by keying in your valid email address. Then you need to click on “Create Blog”, this would let you create a free blog.
Create an Address: While you are signing up, you will be asked to create an URL or address for your blog. Once you have created an URL, you won’t be able to change it.
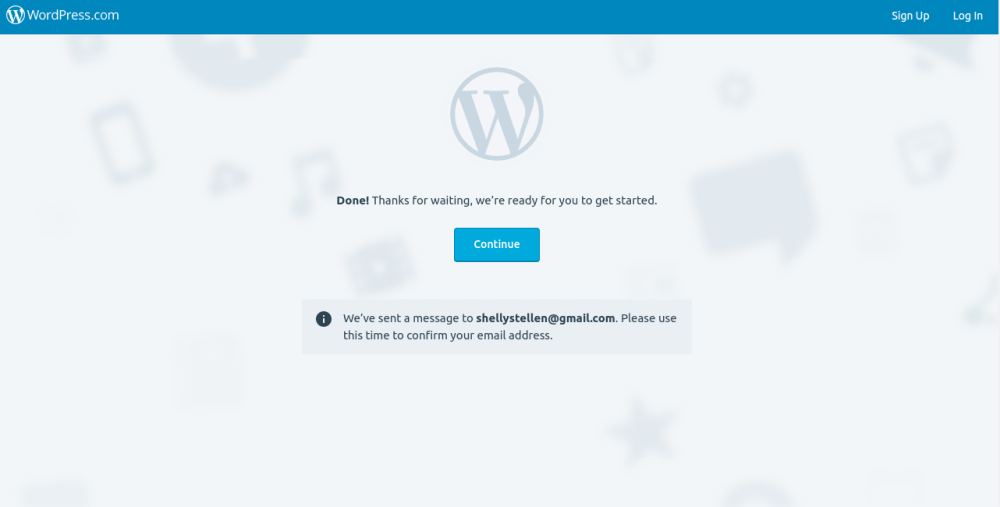
Check your mail: You will be sent an activation link in your email. You need to click on that link which would guide you to the activation page. There you need to click on the “Activate Blog” option.
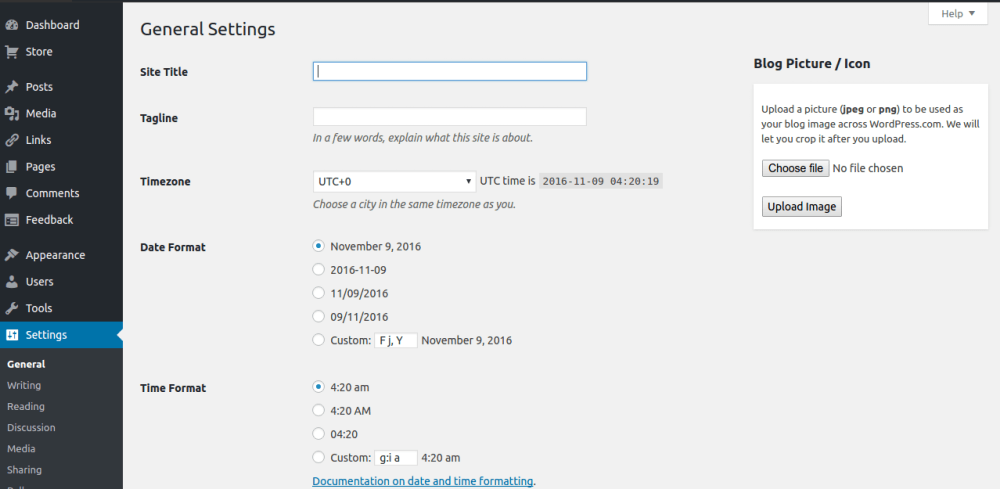
Assign a Title: Once you have activated your blog, you will be directed to your Dashboard. You can go to the “Settings” option and assign a title to your blog by selecting the “General” option.
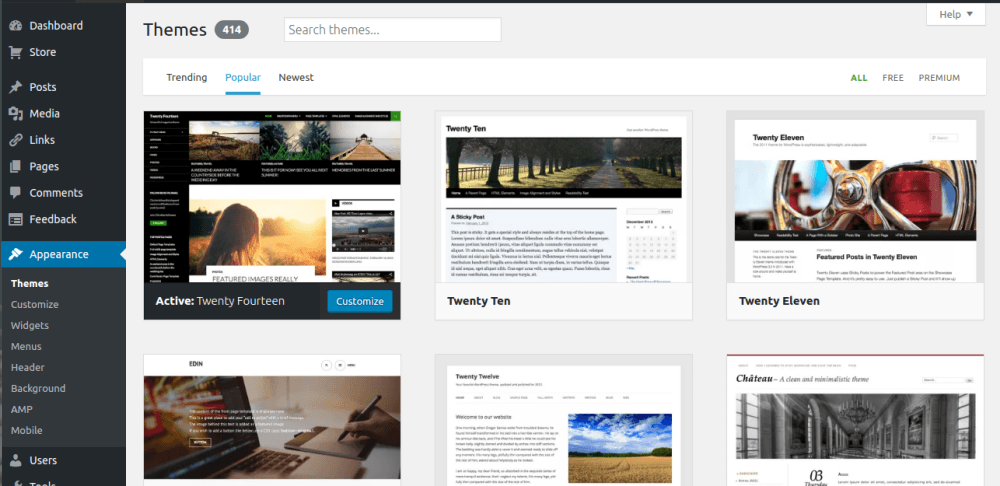
Give a Theme: In this step you can design your blog. You can use a wide range of multiple colors, themes to give your blog an attractive look. You can change the theme at any point of time. There are certain premium themes available which need to be purchased and free also available.
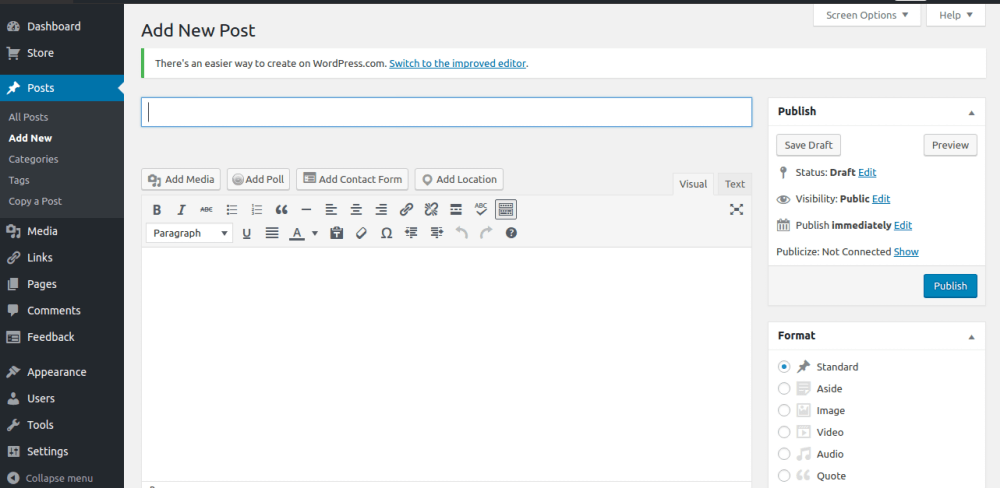
- Blog Post: Now it is the time to make your first blog post. Go to the “Post” tab on your Dashboard and then click on “Add New”. Assign a title to your post and then you can start writing.
- Widgets: There are collections of widgets found in every WordPress blogs. These widgets are available on the right side of your blog’s home page.
- Add Pages: If you wish, you can add multiple relevant pages to your blog with different contents which would make your blog look professional and attractive to the viewers.
- Make it different: If you wish your blog to stand out among others, then you need to put in a little bit of efforts. You can add certain features like reader interaction, posting frequency, optimal post length and others.
- Promote the blog: Once you have your blog up and running, it is time to promote it. You can use social media to good effect when it comes to promoting your blog.
Creating attractive blogs have never been so easy before as of now with WordPress Website Development. Also you need to choose best hosting & SSL certificates providers in order to make your business secure online.
Author Bio:
Jason is a renowned web development professional who works with WordSuccor Ltd., a leading WordPress Website Development Company with a global reach. He is a passionate blogger who loves to write and share everything about WordPress and new web design technologies.

WordPress is very popular website developing and blog platform with tons of SEO advantages. It is very famous CMS used by thousand of websites from many years. When we developed a website OR launch any website of our personal OR business, SEO is now a day compulsory thing to take in consideration.
SEO is to optimize a website to increasing traffic to a website which ultimately increase your visitors to website. If your website is developed using WordPress platform than SEO of such website is somewhat different from other simple static OR dynamic website. SEO of WordPress site is easy and it is shown by many years that wordpress sites are perform well in SEO, WordPress site is ranking well in search engines for its targeted keywords.
WordPress SEO is drive with the different supported WordPress Plugins. SEO of wordpress sites are done with the help of different SEO plugins. One of the main and popular SEO plugin for WordPress site is Yoast SEO plugin. The beauty of this plugin is – it is with no of charges means free for all and easy to use by thousands of WordPress sites owners.
One can easily integrated yoast seo plugin to its WordPress site. After adding this plugin into the site, you can add all seo stuffs like Title, meta descriptions, meta keywords, Header tags etc. to each and every webpage of the site.
Other wordpress plugins which help for seo is LinkPatrol , Nofollow check box in WordPress which are helpful for SEO. When you want to start SEO of your wordpress site, after adding yoast seo plugin, you should first make keywords research for deciding your targeted keywords. Titles and meta descriptions are written using targeted keywords and with extra care because these things are highly impact on higher or first page rankings of the targeted keywords. Other factors including Header tags, images, alt attributes are also considered as a important in SEO of wordpress site.
WordPress is a CMS and also mainly used as a blog platform so one can easily update contents frequently on wordpress blog. Other SEO tools which can help are:

LinkPatrol is a premium WordPress plugin which allows you to control all the links on your website.
You can monitor all the outgoing links on your site, find out which links are giving away link juice, and more. LinkPatrol is less resource intensive than other free plugins that do the same job. It provides a quicker and efficient way to clean up all your anchor text, spammy links, and link juice problems with a very intuitive and super fast user interface.
![]()
SEMRush is a tool that Pros use to gather analytics and insights from their competitor’s to help improve their own SEO. You can learn about organic keywords to rank for, places where you can get backlinks from, insights into your competitor’s advertising strategies, and so much more. SEMrush is a paid subscription and is used by thousands of SEO professionals all over the world. It can provide you an enormous wealth of data.
Thus SEO of WordPress is made easy with the help of different WordPress Plugins.
For WordPress Premium themes please visit us at SoloStream Themes.
WordPress is widely accepted theme based CMS platform for many years. Day by day new upgraded versions makes WordPress better than before. WordPress is fully flexible to adopt plugins and themes. One can create a very good website of any kind with the help of wordpress. This is time of Ecommerce boom. Every day new online stores of different kinds are launched on the Internet. Now Can WordPress is good CMS platform to use as a Online Store…?? There are other Ecommerce based CMS are also available in Market like Magento.
WordPress cut throat competition is with Magento for building a fully functional Ecommerce site. WordPress plugins and themes to their Ecommerce website functioning well, but these plugins and the key issues could be a trouble for you while you are advancement with the WordPress installation. It is good if your themes and plug-in installed should compatible with the updated version. If you can choose a WordPress theme that is very responsive and mobile friendly website for e-commerce areas, such as auto-side and exit, there is a excellent opportunity that you will enjoy this rising segment -Shopper in line and sell more products.
However, e-commerce actual exchange rates are much lower for shoppers visiting stores on a smartphone. One way to see this is that there are buyers, the use of wireless devices, but for some reason not as many, buying items that add that their desktop counterparts in the basket. Ecommerce store should be easily flexible to add delete products frequently. Other transactions should be carried out smoothly. Durable to handle heavy traffics should easily upgraded without damage of data or information. For any Ecommerce store, frequently changes in home page, data, information is daily process so your Ecommerce site should be easily adopt these changes. With wordpress you can do all the above mentioned things. There are many wordpress plugins and themes are available in market which help to build a better Ecommerce store online.
SoloStream WordPress Themes has a number of beautiful and functional online stores themes to create good Ecommerce store. These themes are create to easily adopt with WooCommerce, easy digital downloads and other accessories e-commerce.
Adding to WordPress platform there are few plugins and top themes that ads the validation of ecommerce into the WordPress. There is WooCommerce for eCommerce, JS Composer for Writing, BBPress for Forums, and many plugins that are existing into the market are the ones that help to be the most favorite Open Source among the others.
So what are you waiting for..?? Go for better WordPress Ecommerce Theme and start your Ecommerce Store.
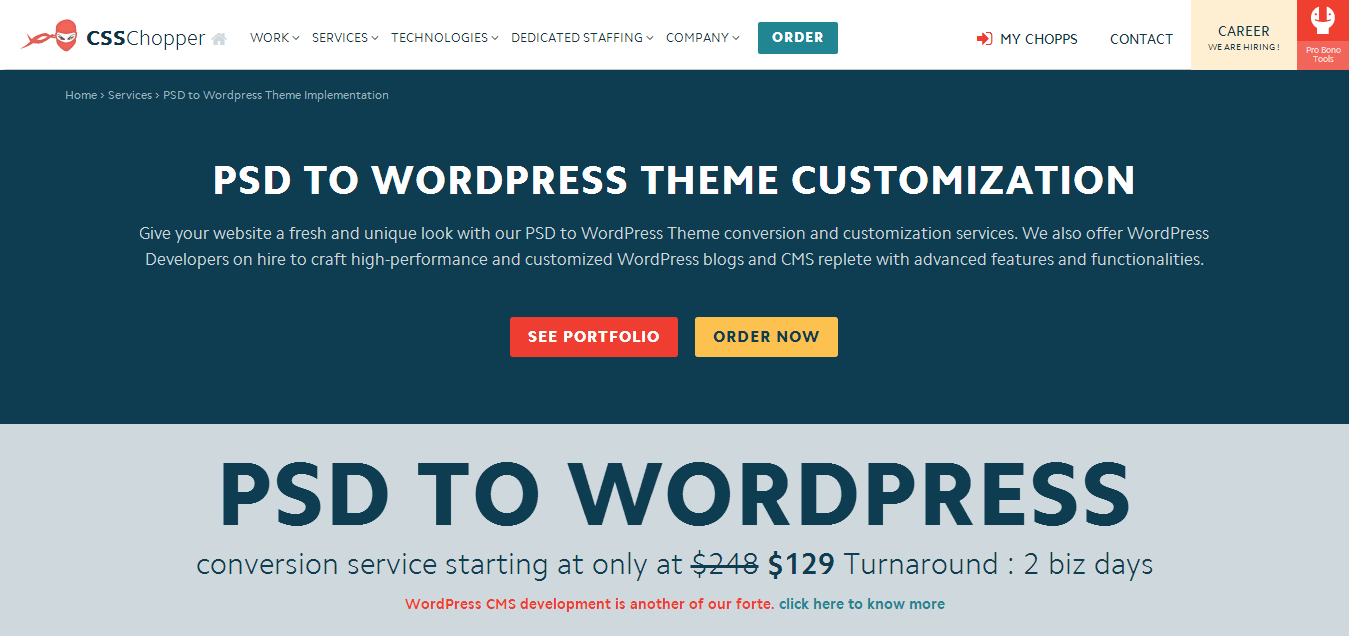
Looking for the one stop solution for customization of your PSD design into WordPress theme? Being a well-known web design and development company, CSSChopper understands the need of adopting advanced technology and the latest methods in this online era.
WordPress has become the most preferred CMS for businesses of today, and CSSChopper is running compatible with the same by delivering fine quality PSD to WordPress theme conversion and customization. The team has incredible WordPress theme solutions to make a business stand for various platforms.
WordPress, being an open source platform built on PHP, makes it easy to manage a website’s content. Attractive designs with rich features can be easily achieved with much ease and affordability. These features that put into your website make it fully functional. A relative plug-in architecture or a simple template system can be chosen for your WordPress site as per your convenience, and you can make it attractive and user-friendly.
Also, if you have a start up business, maintenance cost is an crucial aspect to notice. PSD to WordPress conversion is a smart choice because WordPress is very easy to install, integrate and use. Yet another necessary feature of this conversion is Search Engine Optimization friendliness which adds more points in a website’s functionality. The SEO plugins offered by WordPress come into effect when you opt PSD to WordPress theme customization.
CSSChopper Team
The company has brilliant minds which are delivering the clients with top notch services from years. They are specialized in converting the PSD and similar format designs into WordPress themes with utmost functionalities being injected. Your business can beat the competition around with the customized results offered by CSSChopper.
Updated with all the latest technologies and skills, the CSSChopper team is capable of converting PSD to WordPress for your online store, social media websites and even very basic sites. You will get a feature-rich and easy to maintain website as the resultant product via our dedicated developers who have handled plenty of complex projects.
Why Choose Them
Working with CSSChopper is a hassle free process, as their team makes the entire conversion process a cup of cake. You will get a fully customized solution keeping in hand for what you exactly came. You just have to come with the PSD file and they will do an effective PSD to WordPress theme conversion. They can also create a PSD file for you if you do not have one.
PSD and other formats are converted through HTML, HTML5 and CSS into the hand coded format. This code is W3C compliant to assure that your site is following all the web standards. Moreover, you will get a translucent working process while working with your website.
100% pure WordPress themes are guaranteed with CSSChopper along with faster PSD to WordPress turnaround time. Cross-browser compatibility with all major browsers is also an obvious as well as important feature. As each specification of the customers has been heard patiently, contentment in performance is a regular task for them.
Portfolio-
o through the featured portfolios of CSSChopper to know more about them and to find what makes them so cool in the web designing and development. Here are some of the projects for which CSSChopper has delivered its honest services and showered satisfied results to the worldwide customers.

Also see :
Best portable headphones amplifiers
Conclusion–
PSD to WordPress theme conversion is an amazing way for boosting a website’s appearance, which CSSChopper does beautifully. You will be rendered with an eye catchy website with unique look and feel. The CSSChopper web developers do outstanding work with colors, fonts, skins, themes and appearances for a drastic change in its overall layout and thus to guarantee amazing returns.
Your website can also be linked to your Facebook, MySpace, Digg and other social media profiles in order to drive traffic from varied sources. This is a motivating factor in terms of gaining a fair amount of traffic and thus to maximize business. In a nutshell, this is what a business owner, who is running his company’s website, looks for.
To get productive results for WordPress conversion, CSSChopper stood a winner for us. We genuinely appreciate the team and suggest their name if you also want a business-centric professional design in your website (rather PSD to WordPress Theme).
The best website today is powered by the WordPress, one of the best and very easy to use content management system that allow you to make changes your website without using any special coding language, it simply needs basic common sense towards the website.
If you are planning to get a new website online than you should not wait or surf around there is better solution that you can find below,
These are one of the most efficient and usable open source into the market although they are free, this is its one of the strength and more resources are available because of that.
According to your requirement you can choose one of the platform from above and that surely meet your requirement if you are looking for some entry level or business website that you can survive easily. But yes when you are looking or requiring the hardcore development than yes you need to have the custom development either on the php or asp.net.
Considering that we are requiring entry level website or ecommerce site or some blog or forum development than what should be the right choice for right requirement.
Now Here we can see the actual tabular comparison for these 4 Open Sources CMS
| WordPress | Joomla | Drupal | Magento |
| FREE | FREE | FREE | FREE |
| 140 Mill Downloads | 63 Mill Downloads | 15 Mill Downloads | 4 Mill Downloads |
| WordPress Forum | Joomla Forum | Drupal Forum | Magento Forum |
| 4K+ Free Themes | 1K+ Free Themes | 2K+ Free Themes | 1K+ Free Themes |
| 45K+ Free Plugins | 7K+ Free Plugins | 34K+ Free Plugins | 1K+ Free Plugins |
| Top Site : Forbes, CNN SONY |
Harvard University, Linux The HILL | WB, White House | Rite Aid, Warby Parker, olympus |
| 5 Mins Setup | 10 Mins Setup | 10 Mins Setup | 10 Mins Setup |
| Small & Medium Website / Corporate Websistes | eCommerce / Community Portal and Social Network Sites | Suitable for everything | eCommerce |
- WordPress : Its one of the best choice of beginers as well as for pros but yes always 5 fingers are not the same there are people who doesnt know the strength or maintenance of the the WordPress that is why they are more often to go with other platform but when you know what you doing than WordPress is the one.
- Joomla : Perfect for the Community site or for some kind of organization site that more into informatics and for the society. The resources in terms or plugins/extension or components are more suitable for those kind of websites.
- Drupal : It is little difficult to setup and operate though its most versatile and powerful all you require is HTML, CSS and PHP knowledge than you will be comfortable to work and get up and running your website
- Magento : Many people thinks the Magento is one of the most powerful open source for eCommerce compared to other open source specially the WordPress but I guess they are wrong, they both are competitors for each other, Magento is one of the best on its way while WordPress is loaded with WooCommerce Plugin.
Addition to WordPress platform there are few plugins and premium themes that ads the valudation of ecommerce into the WordPress. There is WooCommerce for eCommerce, JS Composer for Writing, BBPress for Forums, and many plugins that are available into the market are the ones that helps to be the most favorite Open Source among the others.
As you now there are different ways of creating websites and the WordPress is the most simple and efficient way for it. The online store that is presented in this post is designed for selling some dresses and accessories. Let’s go!
- Choose and install the plugin
Before creating the website the user need to choose the plugin, which is more efficient for his/her website. I was digging through the WordPress plugins and find out the suitable one. I quested and found out the Huge-IT Product Catalog plugin. Sure there are other plugins such as WordPress Catalog, Catalog for Woocommerce, Product Catalog 8 and others but the one that I chose was the one I liked most.
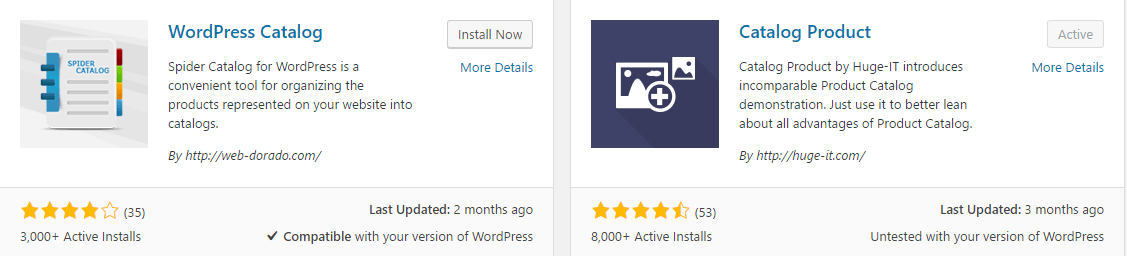
After searching the plugin it is necessary to install it on the WordPress website. Press the “install now” and just activate.
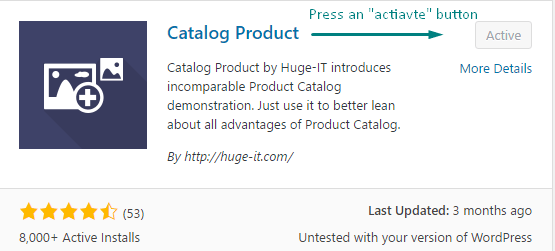
After the activation of the plugin the icon appears on the dashboard. So, let’s get acquainted with its functionalities and opportunities. Hope this information will be useful for online store creators.
- Upload images (products)
In order to create a catalog, simply go to the catalog page and add new catalog. For changing the catalog name the user need to press the pencil icon on the top and just to write the name he/she likes.
![]()
For adding products to the catalog first it is necessary to upload images to the media library from PC and only then from the Media Library to the Catalog. It is very important to be able to add multiple images at a time. The ctrl button may helpful in this case. There is no anything easier than pressing and selecting images, which are suitable for that particular project.
After installing the product let’s get acquainted with the options of the plugin. The most interesting feature of this plugin is that there is the option, where price discount. I am sure that everyone saw such kind of discount in the well known online stores as the ebay, Aliexpress, Amazon and so on. Sure they have different designs but the same aim, that it to attract the potential consumers. So, there are two fields for the price: one of them is the product’s real price and the second one is its discount. In the description field the website builder may write some additional information about that particular product: it’s appearance, material, size etc. Under the main image (that is the one that will appear with the largest size on a website) you can see the “plus” button-field, which is designed for additional images (some details of the product, other variants, colors, sizes of it and so on) . They are called thumbnails.
Another crucial tool of this catalog is a “view product” button. It has a special URL (it may be the page of a social network, website page, video link or something else). It can be opened in a new tab or just refresh the same page. By default it is set as the special page, which opens your products details.
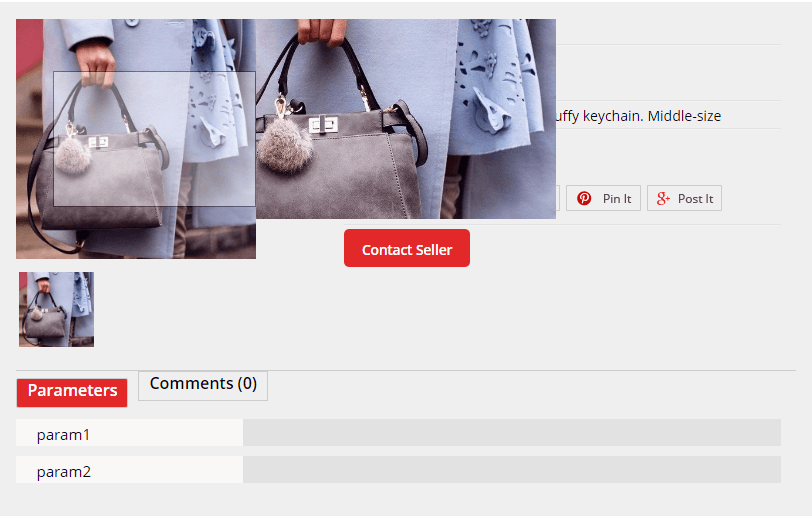
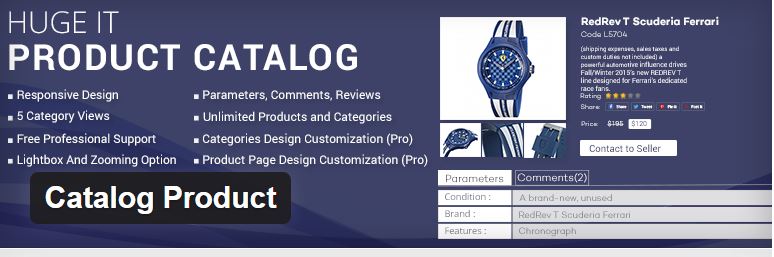
As it is obvious from the screenshot all the information about the product is collected here: rating stars, social shares, parameters and comments. All these additional information gives the overall idea of the product.
While hovering the main image the zooming effect pop-ups, it makes the details of the product clearer and brighter.
And the last part of this page is a “contact seller” button. It will help the website visitors to contact the owner-seller and order the product.
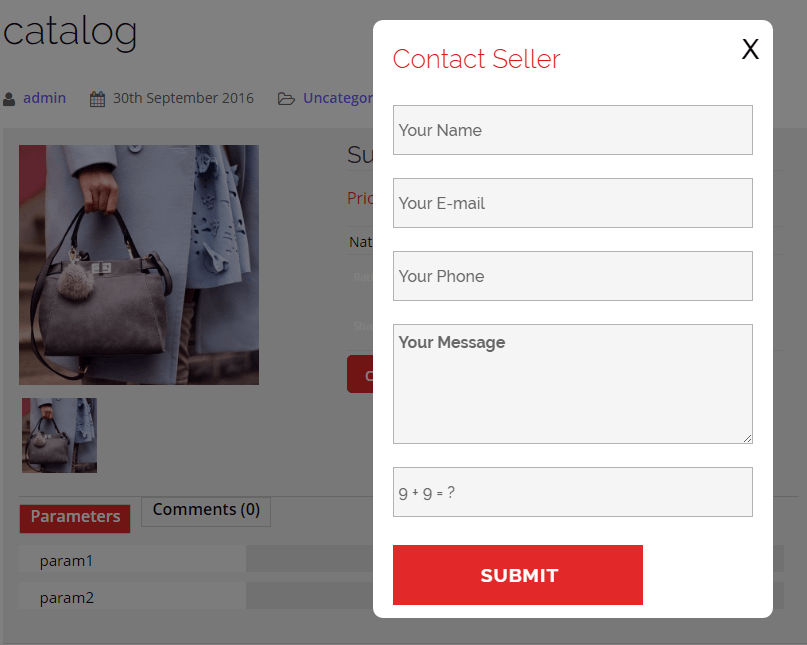
If this pop-up is not useful for the user, it can be replaced with any other information: Facebook page, LinkedIN, twitter and even some page where the contact form is added on your website. Anyhow, your visitors need to contact you in order to have more information or order the product. In this case the Breezing Forms plugin may help you to communicate with your customers. Sure, there are many other plugins and the website designer may use the one that satisfies all his/her needs and requirement. This one is just an example.
- Select a view
After adding the products, writing all the information about them it is an appropriate time for selecting the view. They all are so different but so attractive. The views are Blocks Toggle Up/Down, Full-Height Blocks, Catalog/Content-Popup, Full-Width Blocks and Content Slider. For now I am using the Blocks Toggle Up/Down view. The usage of view mainly depends on the taste and overall design of the page. Also, the quantity of products on page can have a great impact on the user’s decision because if there are more than 20 items, it is not comfortable to use Full-Height Blocks. It will be better to use Blocks Toggle Up/Down or even Content Pop-up.
- Add the catalog to the page
There are different ways of adding the created catalog to the page or post. The easiest and fastest way is copying and pasting the shortcode to the page or post. This was is useful for adding the one catalog at time with all their items
But I would like to show a little bit complicated way. It is has a very interesting feature, that doesn’t exist while simply copying and pasting the shortcode. So, when selecting the catalog button, the popup with the list of catalogs will emerge.
From this list it is possible to choose the catalog, which one the user decided to has in his/her post. Having simultaneously as many catalogs as the user wants is not a problem. The ctrl button will help here too. After inserting the catalog(s) to the posts and publishing, it will appear on the page. Here is the peculiarity of adding the catalog with this way. After going to Products, it is possible to choose one of the catalogs and within it select separate products that will appear on the page. Let’s imagine that you have the ready catalog but one of of the items is already sold. In order not to go to the catalog, delete the item, save it and publishing again, it is available simply not to selecting it while publishing the catalog. This is the feature that I like most in the Huge-IT Product Catalog Plugin.

- Use other tools
Of course, having the single catalog on the page is boring and too simple.So, in order to make it more professional and smart it is vital to use some other tools addition to the main catalog. These tools will decorate an online store. For example, I would like to have a slider with the products of catalog on the header of my Home Page. The slider will give the overall idea about your store and it may include items from different catalogs. One of various sliders that worth to use is Ultimate Responsive Image Slider.

This plugin is very easy to use and customize. For creating a slider we need to upload images, like in any other plugin and start to customize it. It is possible to change its width, height, title font style, size and colour. These options and not only are available even in the free version. Finding out free plugins with are such flexible is very important for the beginners and website creators, because before buying the commercial version it is more reasonable to get acquainted with the free version of the same plugin, test other plugins, compare them and only after finding the final slider, buy the commercial version of it in order to get more options available. This digging process will give you experience and quality in using any kind of plugin. So, let’s see what was my result with this slider.

As you can see it looks very interesting and attractive
Another tool that worth to be used while creating the online store is a Maps plugin. This plugin may help the owner of the online store to indicate his/her location, if it is a real shop this plugin will make to show where the shop is situated and consequently will make it more popular and easy to find too. For this purpose Basic Google Maps Placemarks plugin may be used. It allows adding different icons. There are other plugins that may indicate some directions, polygons, polylines and so one, but the decision is still up to the user.

If there was the idea about the popularity of the online store it is vital to note about the social Share Buttons plugins efficiency. Such kind of plugin will make an online store well-known and in a great request one’s store. According to this aim you the users may check out different share buttons plugin, among them is AddToAny Share buttons plugin

It is very simply in it functionality, because it fills the page with different icons of social networks and makes your store to “grow up”. Every click on icon will bring the user closer to his/her dream of being successful and well-known businessman
Finally, the example of online store is created with the help of different plugins and this is the first step towards the user’s dream and success. Keep on digging and finding different plugins which can be useful for such kind of a commercial websites may bring an experience and proficiency in this sphere of self- development and website building skills.
Bio:
My name is Anna. I adore creating and sewing dresses. For creating a commercial website (shop) and selling my dresses I use WordPress with its wonderful plugins. I am not a website developer or expert in creating websites, but all those plugins which I use are very simple and they help me in reaching my aims and even dreams. So, if you have any suggestion or advice feel free to contact me on the LinkedIn:
Generating backlinks for your webpage is among the most effective ways to both improve rankings on search engines and increase traffic that you receive. But outreach consultants often warn that the effectiveness of a backlink depends on reputation of the host, which means choosing the right outreach contacts is critical for success. While backlinks from high value contacts can significantly boost ratings, those stemming from shady webpages can not only degrade rankings but can get you blacklisted from Google search results altogether.
There are several factors which decide the quality of a high value backlink, which can be referred to whenever in doubt. These 10 factors will not only aid in gaining backlinks but will also allow you to make the most out of outreach efforts.
- Should Generate Traffic
The main objective of creating backlinks is to direct traffic to your webpage, which in turn increases ratings on Google search results. By measuring the amount of traffic that a webpage receives, the search engine can determine if users are finding the content relevant to their query or not.
Google algorithms factor in the instances visitors click on links and the time they stay on page to determine whether the content was of high quality and captivating for the audience. Even if your page receives minimal traffic through mainstream methods, a few backlinks on reliable and high rated websites on prime locations can create a steady flow of traffic coming your way.
- Source Should Be Verified
Outreach consultants will often state that the backlink is only as good as the source, which is absolutely correct. Webpages with solid ratings will generally be marked as reliable and verified by Google, so focus outreach efforts on such contacts. Not only will they attract a higher percentage of traffic than normal links but will also achieve greater ratings on Google algorithms.
- Relevancy Matters
Instead of choosing to extend outreach on all possible contacts, screen out only the relevant ones. It might seem like wasting possible backlink opportunities but in reality, backlinks from sources related to your content works in your favor.
Google algorithms are designed to provide the most relevant results against user’s query, so it is natural that they will be looking for backlinks which provide content for what has been searched. In case you invest outreach efforts on irrelevant contacts regardless of their ratings, user queries will not match that site and your backlinks there will fail to gather traffic.
- Check PageRank
The value of a backlink depends on the ratings of the page where they are located, and PageRank (PR) is the foremost and easiest way to find that out. Although higher PR indicates a webpage with respectable score, it can be spoofed, which necessitates evaluation from all perspectives rather than deciding on PR alone.
PR for new webpages starts off from 0 and depending on their performance, will either improve or degrade. Although it will be updated over a period of 3 months for general users to view, in reality it continually shifts within the search engine algorithms. This means the PR you get to see is only an estimation of what the algorithms have presented rather than current calculations.
- Go for In-Content Backlinks
Backlinks inserted with the content itself (in-content) have a higher percentage of being editorial links, which are greatly rated by Google algorithms. Because they are present in the content, it signifies that the editor valued the links and added them personally. Moreover, they are easily spotted by viewers due to high visibility which contributes towards increased click through rate (CTR), drawing more traffic your way. Links inserted within main text, top of content or at the main attraction of the page are all in-content backlinks which you should try to achieve from your outreach contacts.
- Include Target Keywords in Anchor Link Text
Adding targeted keywords within the anchor text of backlink allows you to optimize it for search engines, which improves their visibility when searched. Instead of choosing the same keyword or phrase over and over again, adapt by switching to synonyms or similar words as they will have the same chances of being searched by users.
- Increase Your Sources
It has been verified by outreach consultants that the number of unique sources for your backlinks is a significant factor when it comes to deciding rankings on search results. Spread out your outreach efforts to attain maximum number of backlinks from as many relevant sources as you can. Rather than gathering many backlinks from a limited number of webpages, it is better to have a moderate number of backlinks stemming from varying, reliable sources.
- Choose from a Trustworthy Neighborhood
Sites marked as trustworthy by Google are excellent sources for achieving backlinks because they place you in the same category as them. Sites which act as authority figures for shaping trends boost your rankings symbiotically; they benefit from your content and you get to attract traffic and improve on your ratings.
However, the same applies for sites which are shady in nature. Google does not differentiate between sites and backlinks; if it catches your backlinks originating from fake webpages, not only the site but your webpage will also suffer the consequences. Once a page has been blacklisted by Google, it will fail to appear on search results, draining all your hard invested outreach efforts down the drain.
- Reciprocal Links – To Be or Not to Be?
Reciprocal links are generated when webmasters agree to provide links on each other’s webpages. Because this tactic was overused and implemented in wrong manners, not only has its significance been reduced but the penalty for low quality implementation is quite serious as well. For backlinks of purest quality, it is advisable to refrain from obtaining them using reciprocal link method.
- Don’t Pay for Backlinks
Paid backlinks are the easiest of ways to acquire links which will point towards your content. However, the risk far outweighs the advantages they offer, since Google has a strict no-paid-links policy because this practice was also widely abused in the past. Even third party payments are strictly prohibited and if Google sniffs out such activity, prepare to have your page blacklisted from results.
Backlinks – Choose Wisely
Creating backlinks from scratch is no easy task and outreach consultants often advise patience in this matter. Investing in the right contacts and generating high quality links over time is always a favorable strategy as compared to rushing the process and producing those which have a high chance of obliterating your efforts altogether. By consulting with these 10 easy factors, your backlinks will always have the advantage of achieving higher ratings on search engines and generating traffic and reputation for your webpage.
Author Bio:
Komal Parveen is the CEO of Marketing Wind and is an experienced SEO Outreach expert and advertisement specialist. Her interests lie in Digital Marketing Management. She is an internet marketing enthusiast and her specialty is in search engine optimization outreach and content marketing.
Electronic commerce or e-commerce, as we better know, has become an important part of modern trade system worldwide. If you have created a WordPress website for your business and need to build up an online store for it, then you will probably need to use appropriate plugins in order for your store to look pleasant and attract new clients and visitors for your website.
Creating a well-organized product catalog has now become quite easy. There are various plugins for WordPress that can help you when building your online platform or store. But it’s sometimes time-consuming to try different plugins. That’s why we present a list of some helpful plugins you could operate while creating your online store.
- Huge-IT Product Catalog
This is one of the most popular and highly rated Product Catalog plugins applicable for WordPress websites. It enables users to demonstrate and sale products online. You actually create your own online store for your WordPress website with this tool easily. Product Catalog offers you a variety of functions that are very easy to operate.
You will have an online store with zooming options, comment block, sections for price and discount price, and many other features.
Product Catalog offers you an ability to create a store with unlimited number of products. You can also sort the catalogs by categories. A lot of options help to optimize images and sections, for instance, one of main options of this tool helps to add single and multiple images to each product in different catalogs within their categories.
Your customers have certain abilities, too. They can rate the products, add feedback, and write reviews which will show up for each product. Product Catalog offers you Drag & Drop function to easily change the order of the products.
In admin page it offers custom fields with product’s characteristics, like color and price, and besides that you can add more fields.
Huge-IT Product Catalog license provides you with a high level of customization for almost all aspects of the catalog, beginning with the background color and size of the text inside the cell of the product ending the number of products in the series and the number of comments on the product page.
Huge-IT Product Catalog offers you 5 views for your catalog where all your products are demonstrated. They are Block Toggle Up-Down, Full-Height Blocks,Catalog Content Popup, Full-With Blocks, Content Slide.

Content Slider
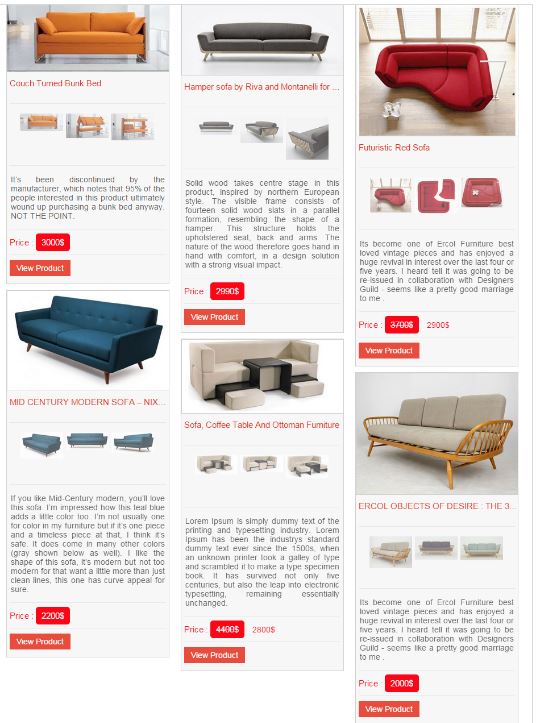
Full Height Blocks
Single Page
For those, who want additional functions for the plugin, Huge-IT offers Product Catalog Pro Version.
Besides basic Product Catalog Plugin in General Options for Pro Users you can find an additional plugin to it, called Catalog Related Products.
You can find more details about the customization in the User Manual of Catalog Related Products plugin.
Your admin page includes:
*Main image
*Additional images (thumbnails)
*Title
*Description
*Price
*Discount price
So, which are the main features?
*5 view options
*unlimited amount of catalogs and products
*full responsiveness
*single product page
*parameters and comments tabs
*image zoom
*image Lightbox popup
*contact seller form
*share and rating
*user-friendly admin panel
The 5 view options are the following: Block Toggle Up-Down, Full-Height Blocks, Catalog / Content Popup, Full-With Blocks, Content Slider.
Add unlimited number of catalogs and products in a single catalog. And as you created a number of catalogs, you can add as many catalog shortcodes in your website, as you need.
Plugin is fully responsive for different sizes of screen. So, your products may look appropriate in any device.
Single Product page generates automatically for each product. Here you will see detailed information about each product, including parameters, rating, share buttons and others.
In each Product Page you can find Parameters tab , next to it Comments tab. This is a great ability for your visitors.
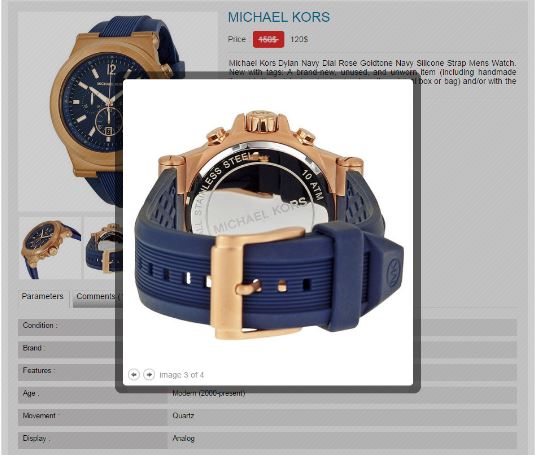
Image zoom is very useful feature, with which you can zoom every pixel of the product image and see it’s details.
Use Lightbox option to show your images in full size. Click on the image and it will be opened in fancy popup with real (bigger) sizes.
“Contact Seller” is a good ability for the customer. To make a purchase or to ask some question in catalog, they can fill the special form and submit the message.
Share and Rating features is also a useful one for you and your customers! it allows your customers rate the product and share it on different social networks, rating can be also managed from “Rating Manager” section
Admin panel is full of user-friendly features, from there you can choose catalog styles, add millions of parameters, change the order of the products and many-many other things that will make creating catalog process easy and enjoyable.
- Maps Builder – Google Maps Plugin
If you have created an online store for your products, but you want to add location to your website as well, you will definitely need a Google Map plugin. We offer one of the most flexible and easy to use WordPress plugins Maps Builder_through which you can build a creative Google Map directly on your website. It will take you only a couple of minutes to create your Google Map for your online store.
The Maps Builder enables you to edit full screen in a Customizer-like environment. This means you can watch all the process of creating your map. You can display nearby business locations and points of interest complete with ratings, custom marker icon. Google Map theme will look beautiful with any design powered by Snazzy Maps, as Maps Builder plugin is integrated with Snazzy Maps. You can also set icons and colors for your map markers. All scripts and styles are optimized and packaged with Grunt. So you will have a very creative and modern interface using the Maps Builder_Google Maps Plugin for your WordPress website.
- Social Share Buttons by Supsystic

You can make you online store socially acceptable by using one of the Share Buttons plugins. This will increase your social popularity and will take social sharing on a next level. It will contribute to the social activity on your site. To have all this you can install for example the Social Share Buttons plugin by Supsystic.
It is a simple, eye-catching social sharing plugin with full customization and various features, such as
*Over 15 Social Networks (Facebook, Twitter, Pinterest, Google+, LinkdIn etc.),
*Responsiveness (which means that it is very easy to operate with different devices)
*Professional Templates of the Social Media Icons & Share Buttons
*Choose pages to show social share buttons
*Simple share buttons configuration and design
*Customizable design and animation effects
*Different Buttons Placement Option
*Content Lock.
Social Share by Supsystic is an easy and fast way to let your visitors share your content to social networks. The plugin is fully responsive and easy to use, so it looks nice on different devices and themes. Because it’s easy to operate, you don’t need to have any programming knowledge or skills to create your own design of share buttons You can easily set the template, size, animation, position of the buttons. The plugin provides you the ability to choose different parts of the page to show share buttons, which will be very useful for you especially when adding it to an online store. Using our plugin you can create Facebook share button widget with share buttons and show the sharing toolbar at theme’s widgets areas. With this options of Social Share buttons, you have much more chances to attract a wide variety of your website visitors. The plugin allows you to choose the various options when to show social buttons (like Facebook share button) – when page load or when user click on page. You are also able to hide social buttons on mobile devices.
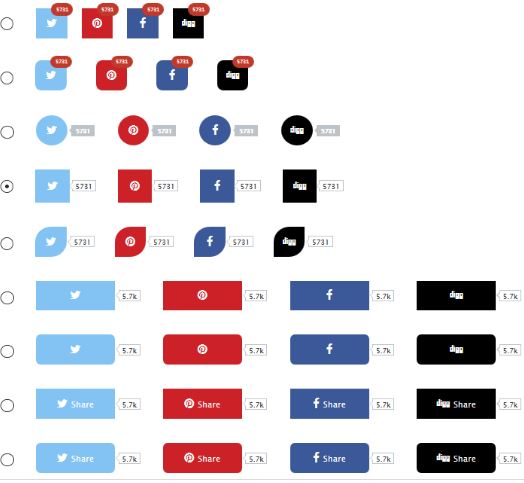
Social Share solution offers you a number of design buttons options and different animation effects. You can choose for example Facebook share buttons design according to your website design, choose buttons size, add button spacing, enable displaying of social share counter, select button and icon animation.
Social Buttons Design
This is a very useful plugin, if you want to give users the tools to share your product details and be easily available.
- Notification Bar for WordPress
When you have created your WordPress online store you may want to notify your website visitors about your new offers and goods. We can offer you a Notification Bar by 8Degree Themes. It is a free WordPress plugin that enables you display a notification in your website. The plugin is responsive and has various useful features that simplify the user needs.
The plugin has a number of important features.
Your notification can be placed at the header or footer, left or right side of your website, where we you find it appropriate to place.
It has highly customizable color settings, font settings, animation effects, placement options etc.
Backend Display Settings Panel
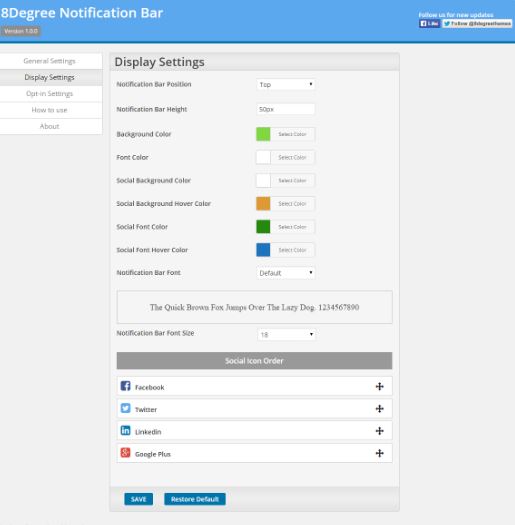
You will have the ability to place the notification in the 4 different parts of the website i.e. header, footer, left side or right side. You can locate it anywhere which you find more suitable than others. You can change the background color with your favorite color and create an interesting notification bar. Font color also can be changed easily.
There are some notification types: Normal Text, Subscribe Form, Slider and Ticker. It has a social profile section with Facebook, Twitter, LinkedIn and Instagram. The plugin allows you to choose the effect types to show notification. There are three animation effects available: Static, Scrolling – left to right, Scrolling – right to left.
You can change the font size and color, choose from 500+ Google fonts with live preview.
The plugin is mobile responsive, it is simple, easy to use and user friendly.
- Custom Login Form

If you want your visitors to become logged in to your website in order to see your goods and receive notifications, then you will need a certain plugin. In the list of WordPress plugins you can find Custom Login Form which is a free and customizable plugin. It does not send the user’s data to third parties, as it offers a high secure login form. You will have a customizable login form design.
You can design your login form with shadows, borders, colors, backgrounds, transparency, etc. After activating the plugin you can configure design of your new login form, paste the login form plugin shortcode on any page or directly in post text of your WordPress; test your created login form, then you can deactivate standard WordPress login form.
You will be also able to add other settings of the login firm plugin, such as redirections captcha code, form design, etc.
The login form plugin can be used to customize WordPress admin login or client login for WordPress websites.
We have just offered some of the useful plugins which you can use while creating a WordPress Online Store. You can find a number of other interesting plugins in WordPress, depending on what you want to add to your online shop. But the above mentioned plugins are the basic ones which you will need to create your online store, easily used by your visitors and customers.