
A WordPress table of contents is an index for your entire website. It automatically lists all the content on your website so that people can easily see what’s on your site and find what they’re looking for.
Most so-called ‘table of contents’ WordPress plugins let you create tables of contents within individual posts. However they don’t list all the content on your website as a whole. These plugins are a useful way of adding navigation within longer posts or pages, creating jump links to all the sections within that page or post. However they’re no use if you want a sitewide table of contents listing all your pages.
There is one WordPress plugin that works differently to this and creates a table of contents for all the pages on your website. You can use it to list pages, create an index of blog posts, or list multiple types of content such as pages and posts together. You can even exclude specific pages that you don’t want to include in the table of contents. In this article, I’m going to tell you how to achieve all these things.
Do I need a table of contents for my website?
Some websites will benefit from an index or table of contents, whereas others probably don’t need one. If you have a fairly small site with just a few pages then a table of contents is probably unnecessary – it’s more suited to larger sites.
Ask yourself these questions to help you decide if your WordPress website needs a table of contents:
- – Does your website have many pages, not all of which fit into the navigation menu?
- – Would you like to display links to all your content on a single page so that people can easily find what they’re looking for?
- – Would you like your users to be able to sort and filter the content on your website to find the page they want to visit?
- – Does your blog have a large number of posts, so that your users have to scroll through many pages to find specific information?
If you answered “Yes” to any of these questions then it’s worth adding a table of contents.
What’s the difference between a WordPress table of contents and a sitemap?
Lots of websites have a sitemap instead of a table of contents. There are 2 types of sitemap – XML and HTML:
- – XML sitemap – We can ignore XML sitemaps for now because they’re used by search engine bots and won’t help real people to navigate your website.
- – HTML sitemap – These provide an unformatted list of all the pages on your website, with a link to each page. You can use a plugin such as Sitemap to create an HTML sitemap.
A lot of website owners provide an HTML sitemap because they think it will help their SEO. They normally link to the sitemap from the footer of their website and don’t really direct users to it. For this reason, HTML sitemaps aren’t usually an important part of a website’s navigation.
A table of contents is designed to be more prominent than a typical sitemap. It should form a prominent part of the navigation for your website. For example, you might add a ‘Table of Contents’ or ‘Index’ link to your menu. People will then click on it, expecting to find a user-friendly list of pages so they can find what they’re looking for.
You can do this with an HTML sitemap – instead of linking to it from the footer, you can add it to the navigation menu.
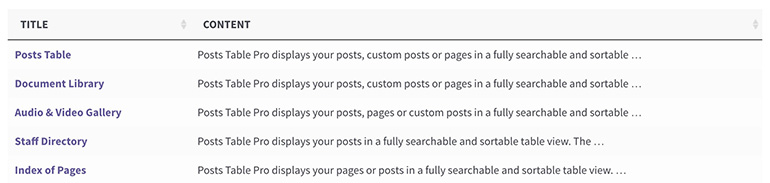
Alternatively, you can create an even more user-friendly WordPress table of contents using the Posts Table Pro plugin. This displays your content in an actual table which your users can search, sort and filter to quickly find the page they need.
Unlike a sitemap, your table of contents can have multiple columns. This means that you can add extra information about each page such as featured image, excerpt and anything else that will enhance your table of contents.
How to create a website table of contents
Follow these steps to create an interactive WordPress table of contents for your website. I’ve also provided a video tutorial where you can see me creating my own table of contents.
1. Install Posts Table Pro
First, you need to get the Posts Table Pro plugin, install and activate it on your website. This provides the functionality you need to display your pages as a table of contents.
2. Add a basic table of contents
Next, add the following shortcode to any page or post:
[posts_table post_type=”page”]
This will create a table of contents listing all the pages on your website.
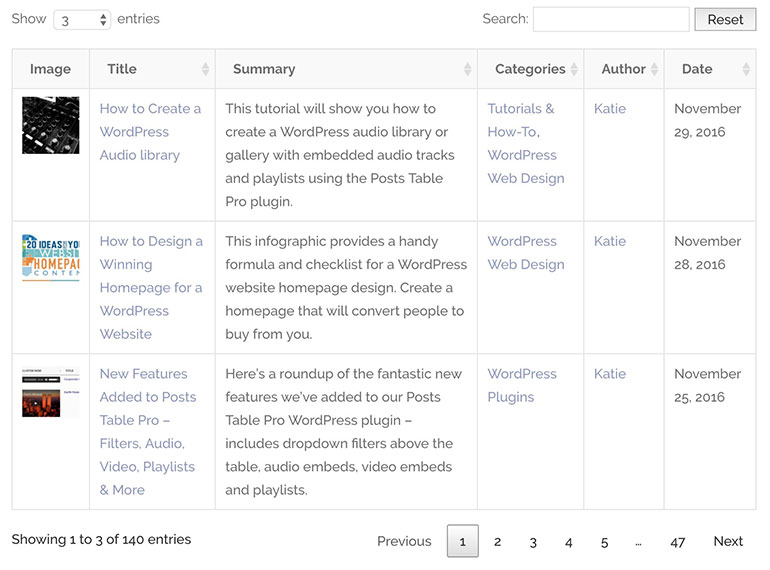
3. Configure the table of contents
As you can see from the above screenshot, the columns in the table aren’t particularly relevant. The pages are listed in the wrong order and there are some pages which wouldn’t normally be included in a table of contents. You can configure the table to make it work exactly as you’d like.
Posts Table Pro has lots of options which you can read about in the documentation. Here are some popular options for tables of contents:
Posts, pages or both?
The above shortcode will display pages from your WordPress website. If you prefer, you can use it to display posts – for example to create an index for your blog posts. You can also set it to display both pages and posts, or even custom post types.
Shortcode example – posts only:
[posts_table]
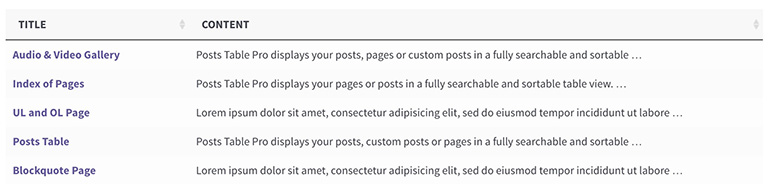
Choose your columns
By default, the table of contents will show columns for Title, Content, Author and Date. This is fine if you’re displaying blog posts, but is less suitable for a list of pages.
Use the columns option to choose which columns appear in the table. I’d recommend adding columns for title and either content or excerpt, plus anything else you’d like to include.
Example shortcode:
[posts_table post_type=”page” columns=”title,content”]
This will display a 2-column table of contents with the title of each page, plus the first few sentences of the page content.
You can control this even further using the documentation. For example you can rename the column headers and choose how much content appears in the table of contents.
Control the order of pages in the table
The sort_by option lets you control how your pages are ordered in the table of contents. This is really important because a table of contents needs to list your pages in a logical order.
By default, your pages will be sorted by their publication date which isn’t very logical for a table of contents. It’s better to sort the table by Menu Order or list the pages alphabetically by title.
Example shortcode:
[posts_table post_type=”page” columns=”title,content” sort_by=”menu_order” sort_order=”asc”]
Exclude anything you don’t want in your table of contents
You can also tell the table of contents to exclude specific pages or posts.
To do this, you need to know the ID of the pages and posts you want to exclude. To find the ID, go to the Edit Page or Edit Post screen and look for the number in the URL – for example if the URL ends with /wp-admin/post.php?post=13781&action=edit then the ID is 13781.
Example shortcode:
[posts_table post_type=”page” columns=”title,content” sort_by=”menu_order” sort_order=”asc” exclude=”13781,13782″]
4. Add the page to your menu
Finally, go to Appearance > Menus in the WordPress admin and add the page containing your table of contents to the menu. Call it something self-explanatory such as ‘Index’ or ‘Table of Contents’.
And there you have it! You’ve created a WordPress table of contents listing your pages in a user-friendly format. By providing an index of your website content in this way, your visitors can easily find the content they’re looking for. They can type a keyword into the search box. They can click a column header to sort the table. They can even choose how many pages are listed on each page of the table.
This will help people to see what your website is offering and how to find it. This will improve the user journey, reducing your bounce rates – and ultimately, resulting in more conversions for you.
Author Bio:
Katie is co-founder of Barn2 Media, one of the UK’s leading WordPress web agencies. Since 2009, she has been working with companies all over the world to get the maximum business benefit from WordPress and the web. She loves blogging about WordPress and how you can use it in new and innovative ways.