
Understanding the WordPress Visual Editor
Posted on Apr 27 2014 by in Blog
WordPress has many wonderful features and provides a simple method of creating a website. This has allowed millions of people with no knowledge of HTML and CSS to create amazing looking websites without much of a hassle. A major part of the look of any WordPress website is the theme that is used. It always starts with the theme and comes down to the content. While you can have a stylish theme, it is up to you, as the creator of the content, to ensure that the pages are readable and work with the overall look of your WordPress website. Fortunately, WordPress has made the creation of new pages and posts a streamlined process, thanks to the WordPress visual editor. If you are new to WordPress and want to make sure that your website appeals to visitors, then check out these tips on understanding the WordPress visual editor.
Adding A New Post
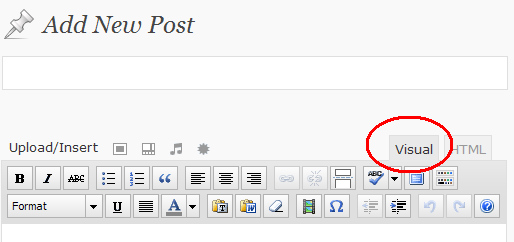
Whenever you create a new post or page on your WordPress website, you will use the WordPress text editor. This editor contains two different viewing options; there is the visual editor and the HTML editor. You will notice that there are two tabs in the upper corner of the text editor. One is labeled Visual while the other is labeled HTML or Text, depending on the version of WordPress that you have installed. If you do not know HTML, then you will be sticking with the Visual editor.
Using The Visual Editor
When you first open the visual editor, you will notice that there is only a handful of formatting options. You can make your text bold, italic, create lists, adjust text alignment, and add and remove links. There are a few more options; though, to see all of the available formatting options, you will need to click on the “Kitchen Sink” icon. Along the tab of formatting options, the “Kitchen Sink” icon is typically towards the end and looks like a small icon representing tabs.
Once you have a grasp of the various formatting options, you will notice that the visual editor works much like any standard text editor, such as Microsoft Word. In fact, you can even paste the entire contents of a Microsoft Word document into your WordPress visual editor, including text and images, while maintaining the same formatting. Some users may find it easier to create their post or page in Microsoft Word and then simply paste it into the visual editor.
Using Headers
Whether you paste your content into the visual editor or type it directly, pay attention to your usage of headers. Headers break up your content and make it more readable. If you are unfamiliar with headers, think of them as titles and subtitles throughout an article. There is a tab in the visual editor that allows you to set the text you are typing as paragraph or headings. There are six sizes of headers. The first heading is to be used for the title of your post or page, with the other sizes used to divide content.

Image Placement
You should also pay attention to the placement of images in your posts and pages. To save space, shrink images and have text wrap around the images. The visual editor also includes options for adjusting text color, which should be used discreetly, as using too many color settings can be distracting for readers.
Finally, if you have performed too much formatting and want to start over without deleting text, you can highlight text and select “clear formatting” and start over.